
Tattoo Stencil Guide: Lines, Mirror and Print Size
Tools · July 16, 2026
A tattoo stencil is the placement and line guide transferred to skin before tattooing. It is not a black-and-white copy of every tone in the artwork. A useful stencil separates essential contours, internal landmarks and optional shading notes, then prints them at the intended physical size. Use the authenticated Stencil studio to create, edit, mirror and print a draft; the tattoo artist should approve the final transfer.
TL;DR
- •Keep the outer silhouette, structural contours and placement landmarks.
- •Do not convert every shadow or texture edge into a stencil line.
- •Use line weight and spacing that remain readable at the intended size.
- •Mirror at transfer/print time, especially for text and directional designs.
- •Print a plain-paper size test and let the tattoo artist finalize the transfer.
What information belongs in a tattoo stencil
| Stencil information | Purpose | Typical treatment |
|---|---|---|
| Outer contour | Defines the overall silhouette | Continuous, easy to follow |
| Internal structure | Places eyes, petals, scales or geometry | Selective lines with clear spacing |
| Shading landmarks | Shows where major value changes begin | Sparse marks, not every tonal edge |
| Registration marks | Aligns split or multi-page pieces | Small clear marks outside the artwork |
| Text direction | Prevents reversed lettering | Verified before and after mirroring |
The exact stencil language depends on the artist. Some prefer a minimal contour map and draw texture during tattooing; others use more internal guides. The software draft should remain editable so the artist can remove information that would become clutter on skin.
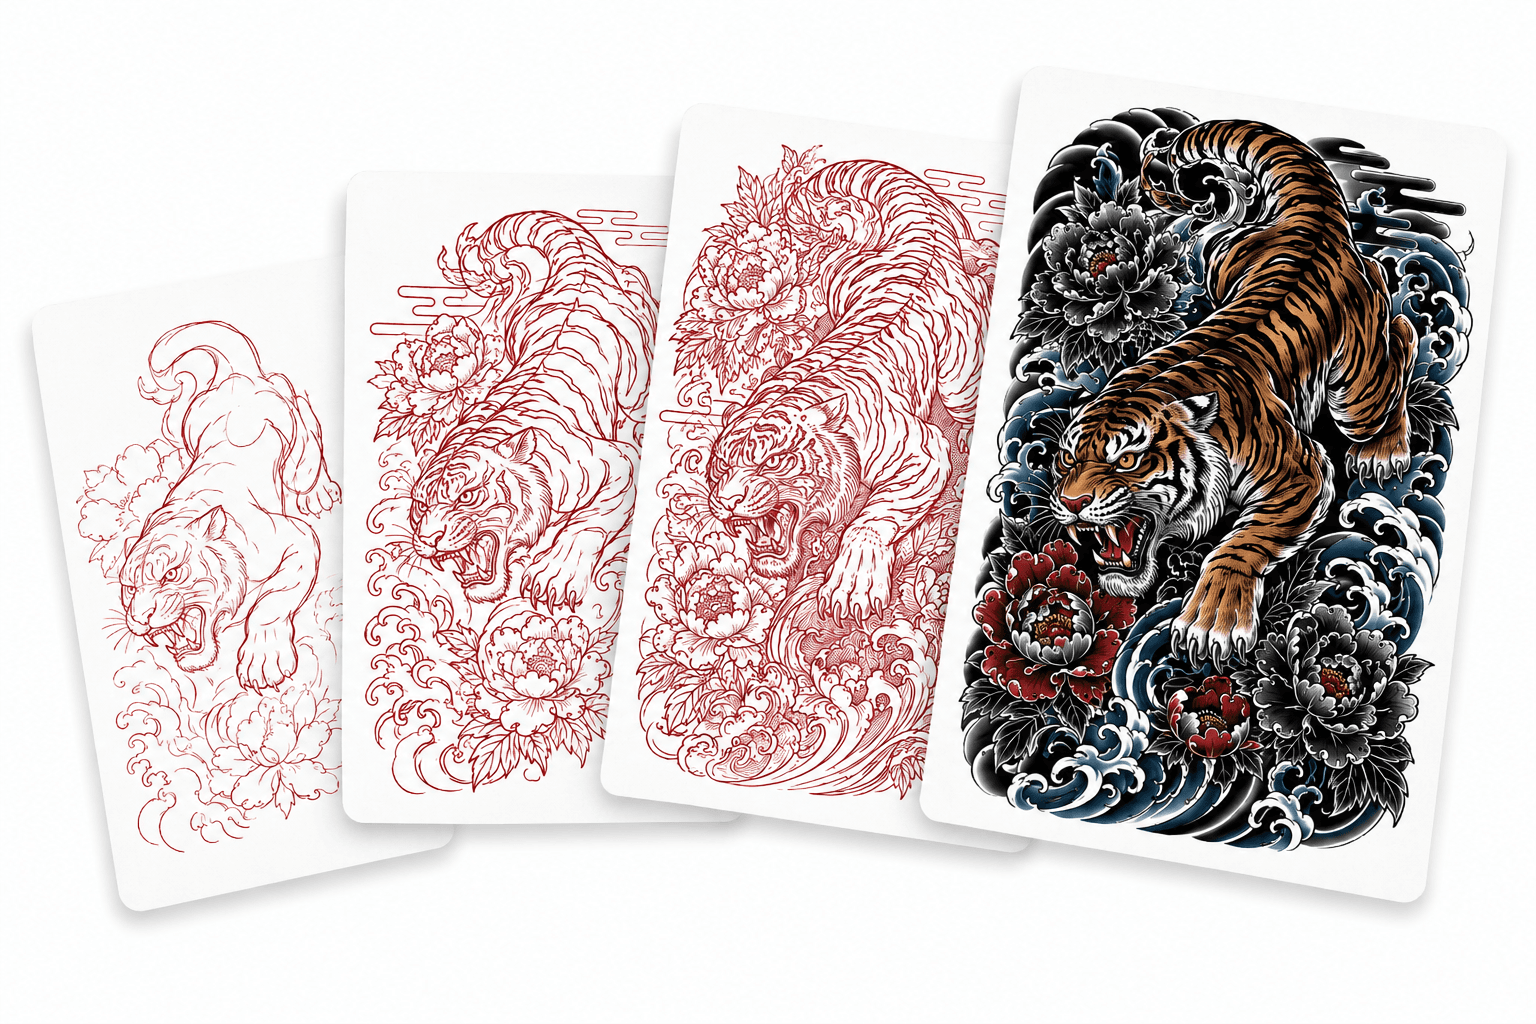
Line extraction is a starting point, not the final stencil
Automatic edge detection sees contrast changes, including hair, skin texture, lighting and compression artifacts. Begin with a preset close to the artwork, then adjust detail and smoothing until the subject reads without a web of small edges. Use darkness and line weight to strengthen intentional forms, not to rescue an over-detailed image.
Mirror only when the transfer workflow requires it
Thermal transfer workflows commonly reverse the printed sheet when it is applied to skin, so the print file is mirrored first. Printer software and thermal machines may also provide their own mirror option. Use one mirror step, not two. Check readable text, dates, handed symbols and asymmetrical faces on the final skin-facing orientation before printing.
Set physical size before judging detail
Studio workflow
Prepare the real stencil draft
Import a design, tune the line extraction, edit manually, mirror and print in centimeters.
✨ Open stencil studioAccount required · PNG, library and print export
A line that looks separate at full-screen zoom may merge in a 6 cm print. Set the intended centimeters or inches, print a plain-paper test at 100% scale and place the paper on the body area. Check silhouette, spacing, body flow and whether the subject reads from a normal viewing distance.
| Check | Pass condition | If it fails |
|---|---|---|
| Silhouette | Subject reads without internal detail | Simplify the crop or pose |
| Spacing | Important gaps remain open at print size | Remove texture or enlarge |
| Direction | Text and asymmetry face correctly after transfer | Correct the single mirror step |
| Page layout | No essential line sits in a printer margin | Reposition or tile pages |
| Calibration | Printed reference length measures correctly | Disable fit-to-page scaling |
What CustomTattoo AI Stencil studio currently does
The studio imports a local image or a generated library design, creates a line base with Fine line, Linework or Traditional presets, and exposes Detail, Darkness, Line weight and Smoothing. You can crop, add text, brush, erase, remove specks and hold to compare with the original. Transfer controls mirror and recolor the raster. Printing supports A4 or Letter, real dimensions and multi-page tiling with overlap, cut marks, page labels and a 5 cm calibration bar. The result can be downloaded as PNG or saved to the library.
Artist handoff checklist
Bring the original artwork, the cleaned stencil draft, intended body area, dimensions and non-negotiable elements. Tell the artist which internal marks are guidance rather than finished lines. The artist should still adjust flow on the body, prepare the skin, choose the transfer method and approve the final stencil placement.
Useful next guides
How to Make a Tattoo Stencil
Follow the studio workflow step by step.
Picture to Tattoo Guide
Choose and simplify a useful source image.
Tattoo Size Guide
Match line detail to physical dimensions.
Should a tattoo stencil include shading?+
It may include selected landmarks for major shading areas, but turning every tonal edge into a line usually creates clutter. The artist decides how much guidance they need.
Do I always mirror a tattoo stencil?+
Mirror when the chosen transfer method reverses the printed image. Confirm whether the printer or thermal machine already mirrors so the design is not flipped twice.
Can I print a large stencil across several pages?+
Yes. The studio can tile a design across A4 or Letter pages with overlap, cut marks and labels. Measure the calibration bar before using the layout.
Sources
- Tattooing 101: stencil paper and thermal transfer workflow · checked July 16, 2026
- BLICK: tattoo stencil equipment overview · checked July 16, 2026
- ImagePrint: mirror, page size and test-print workflow · checked July 16, 2026
Keep reading
How to Make a Tattoo Stencil From an Image
Make a tattoo stencil from an image: import, simplify edges, remove specks, edit lines, mirror once, set real print size and test the layout.
Picture to Tattoo: Prepare a Photo for Your Artist
Turn a picture into a useful tattoo reference by choosing the right photo, simplifying detail, selecting a style and preparing a clean stencil draft.
Tattoo Size Guide: Match Detail to Real Scale
Choose a tattoo size by subject, detail, body area and composition, then prepare dimensions your artist can evaluate at real scale.